Creating a New Knowledge Source
This guide explains how to create a new knowledge source on the Aumo platform. The process begins with selecting the type of source (Google Drive, Web Scraper, Confluence, etc.) and then configuring the specific details for the chosen type.
Overview
When creating a new knowledge source, you will be setting up a connector that will import and process documents from an external source. These documents will then be indexed and made available for use by AI assistants.
Accessing the Creation Page
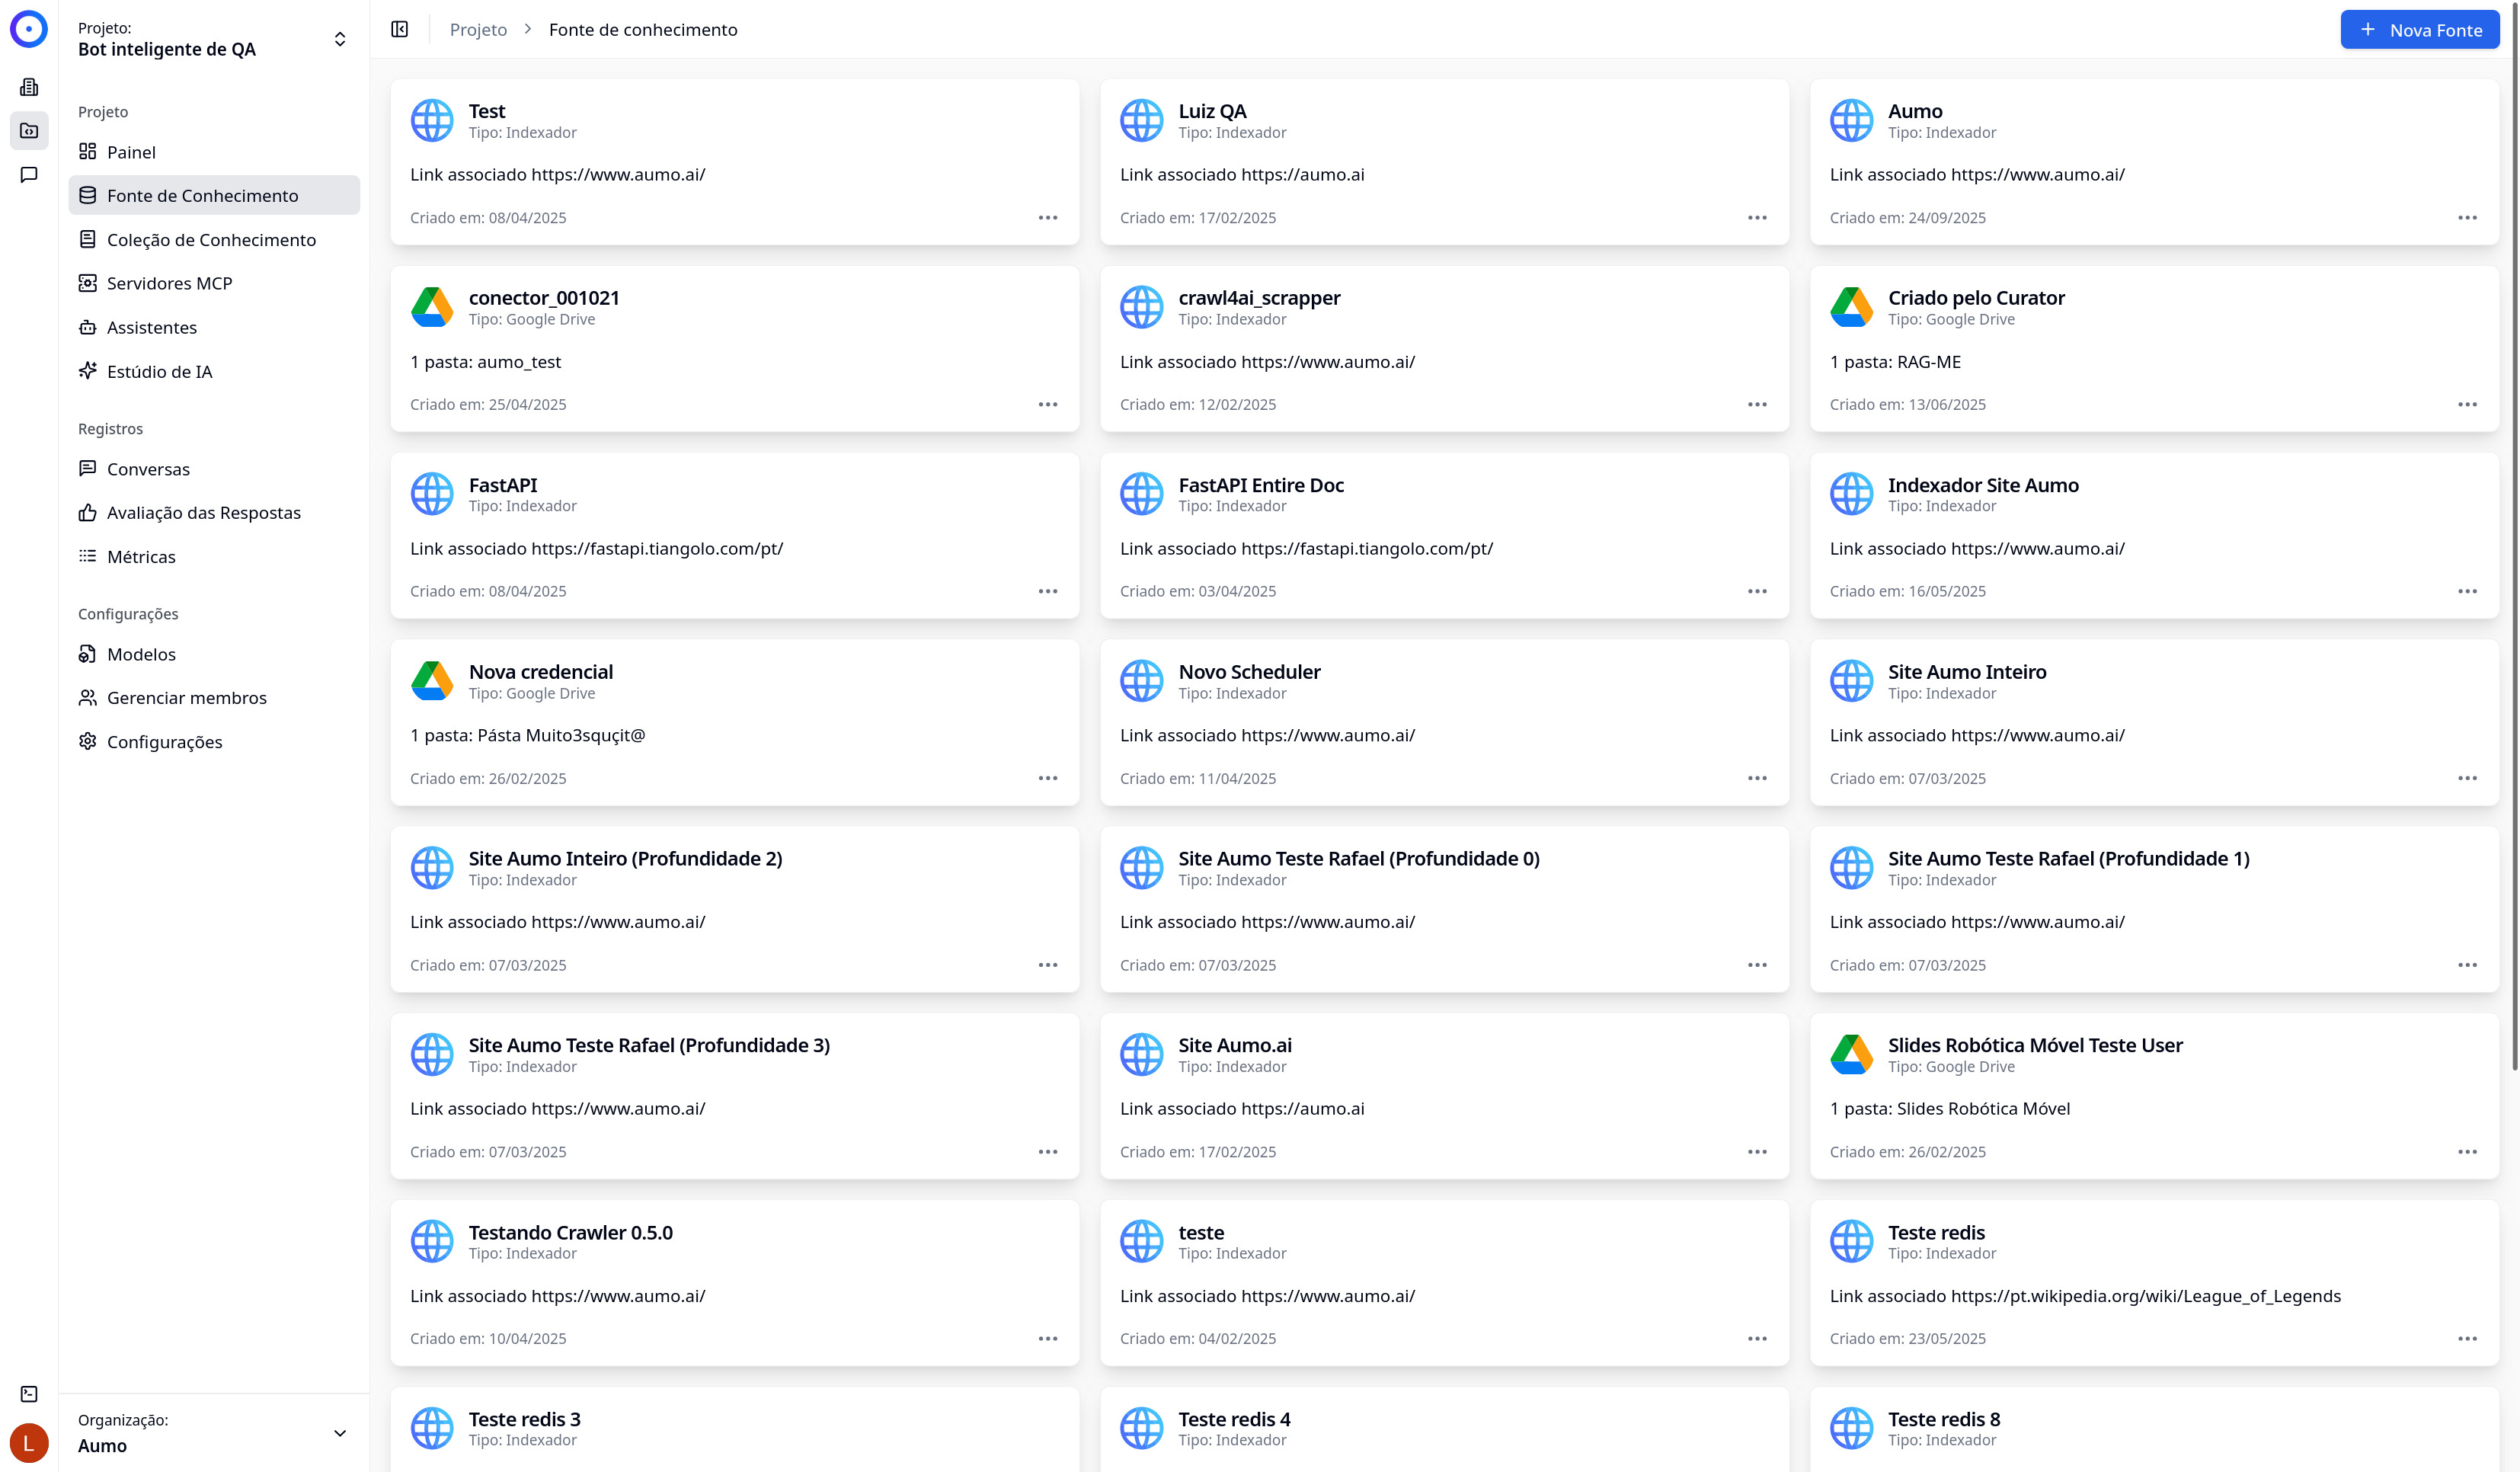
To create a new knowledge source:
- Navigate to the Projects section in the sidebar menu.
- Select the desired project.
- Click on Knowledge Source in the project's sidebar menu.
- Click the New Source button at the top of the page.
Step 1: Selecting the Source Type
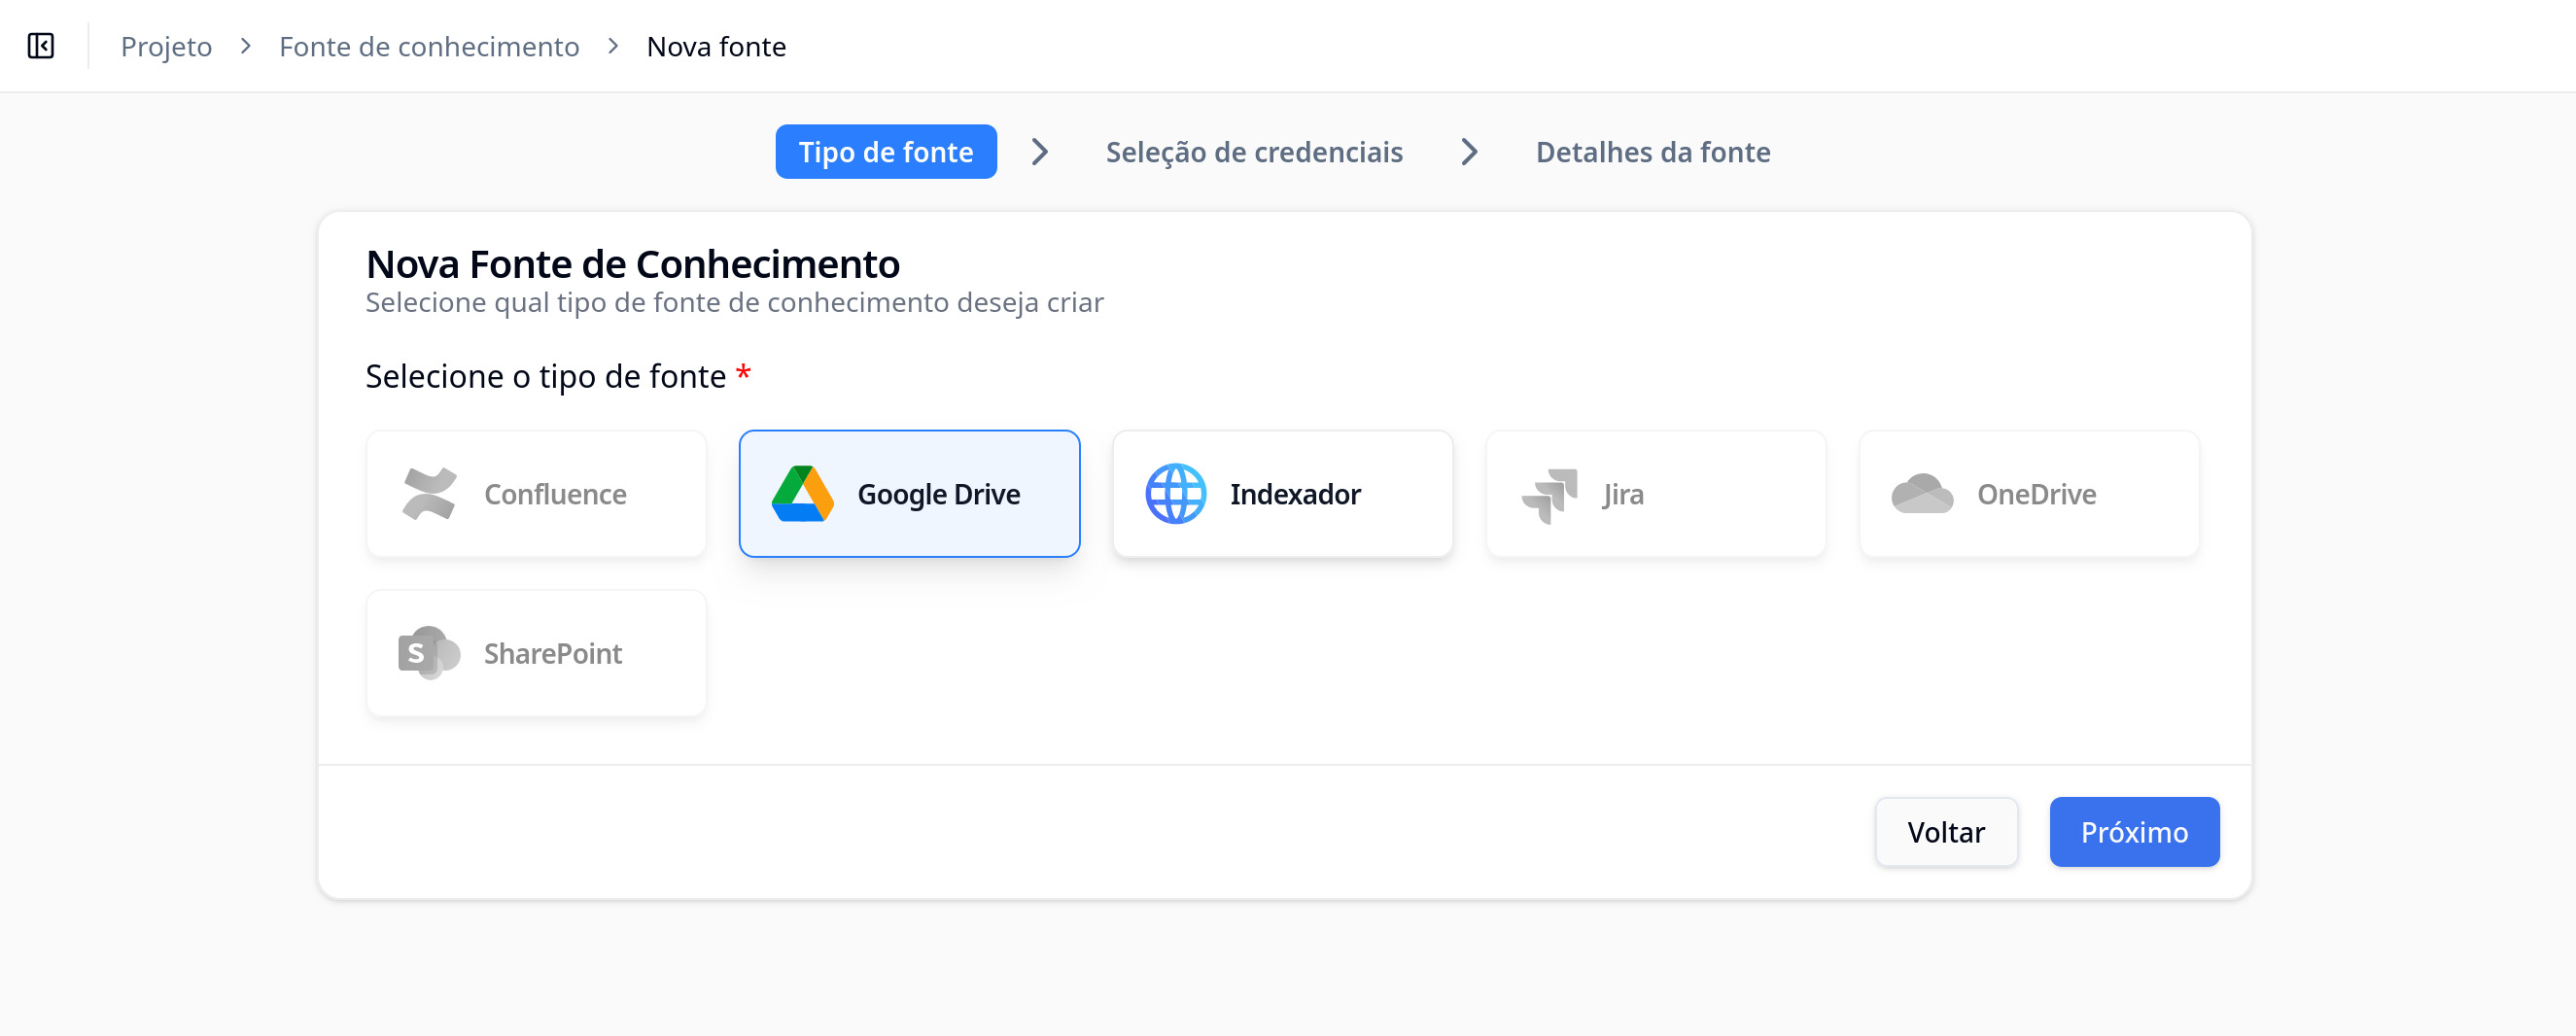
 In the first step, you need to select the type of knowledge source you want to create. The Aumo platform supports the following types:
Google Drive
Connects to Google Drive to import documents stored in the cloud. Allows automatic synchronization of specific folders and files.
Organizational Google Drive
Similar to Google Drive, but allows access to documents from another Google Drive account using service credentials (service account with domain delegation).
Web Scraper (Indexer)
Extracts content from web pages using the link of a website as the knowledge source. You can configure it to extract a specific page or all related pages.
Upload
Allows direct upload of files from your computer to the platform. Ideal for documents that are not in external services.
Confluence
Connects to Confluence (Atlassian) to import pages and knowledge spaces.
Jira
Connects to Jira (Atlassian) to import issues, comments, and project documentation.
How to Select a Type
- On the creation page, you will see the different types of sources available.
- Click on the type of source you wish to configure (e.g., "Google Drive").
- After selecting, the navigation bar will show the steps: "Source Type," "Credential Selection," and "Source Details."
- For types that require credentials (like Google Drive), you will need to select or create a credential before you can proceed.
- After selecting the necessary credential, the Next button will be enabled.
- Click Next to proceed to the next step.
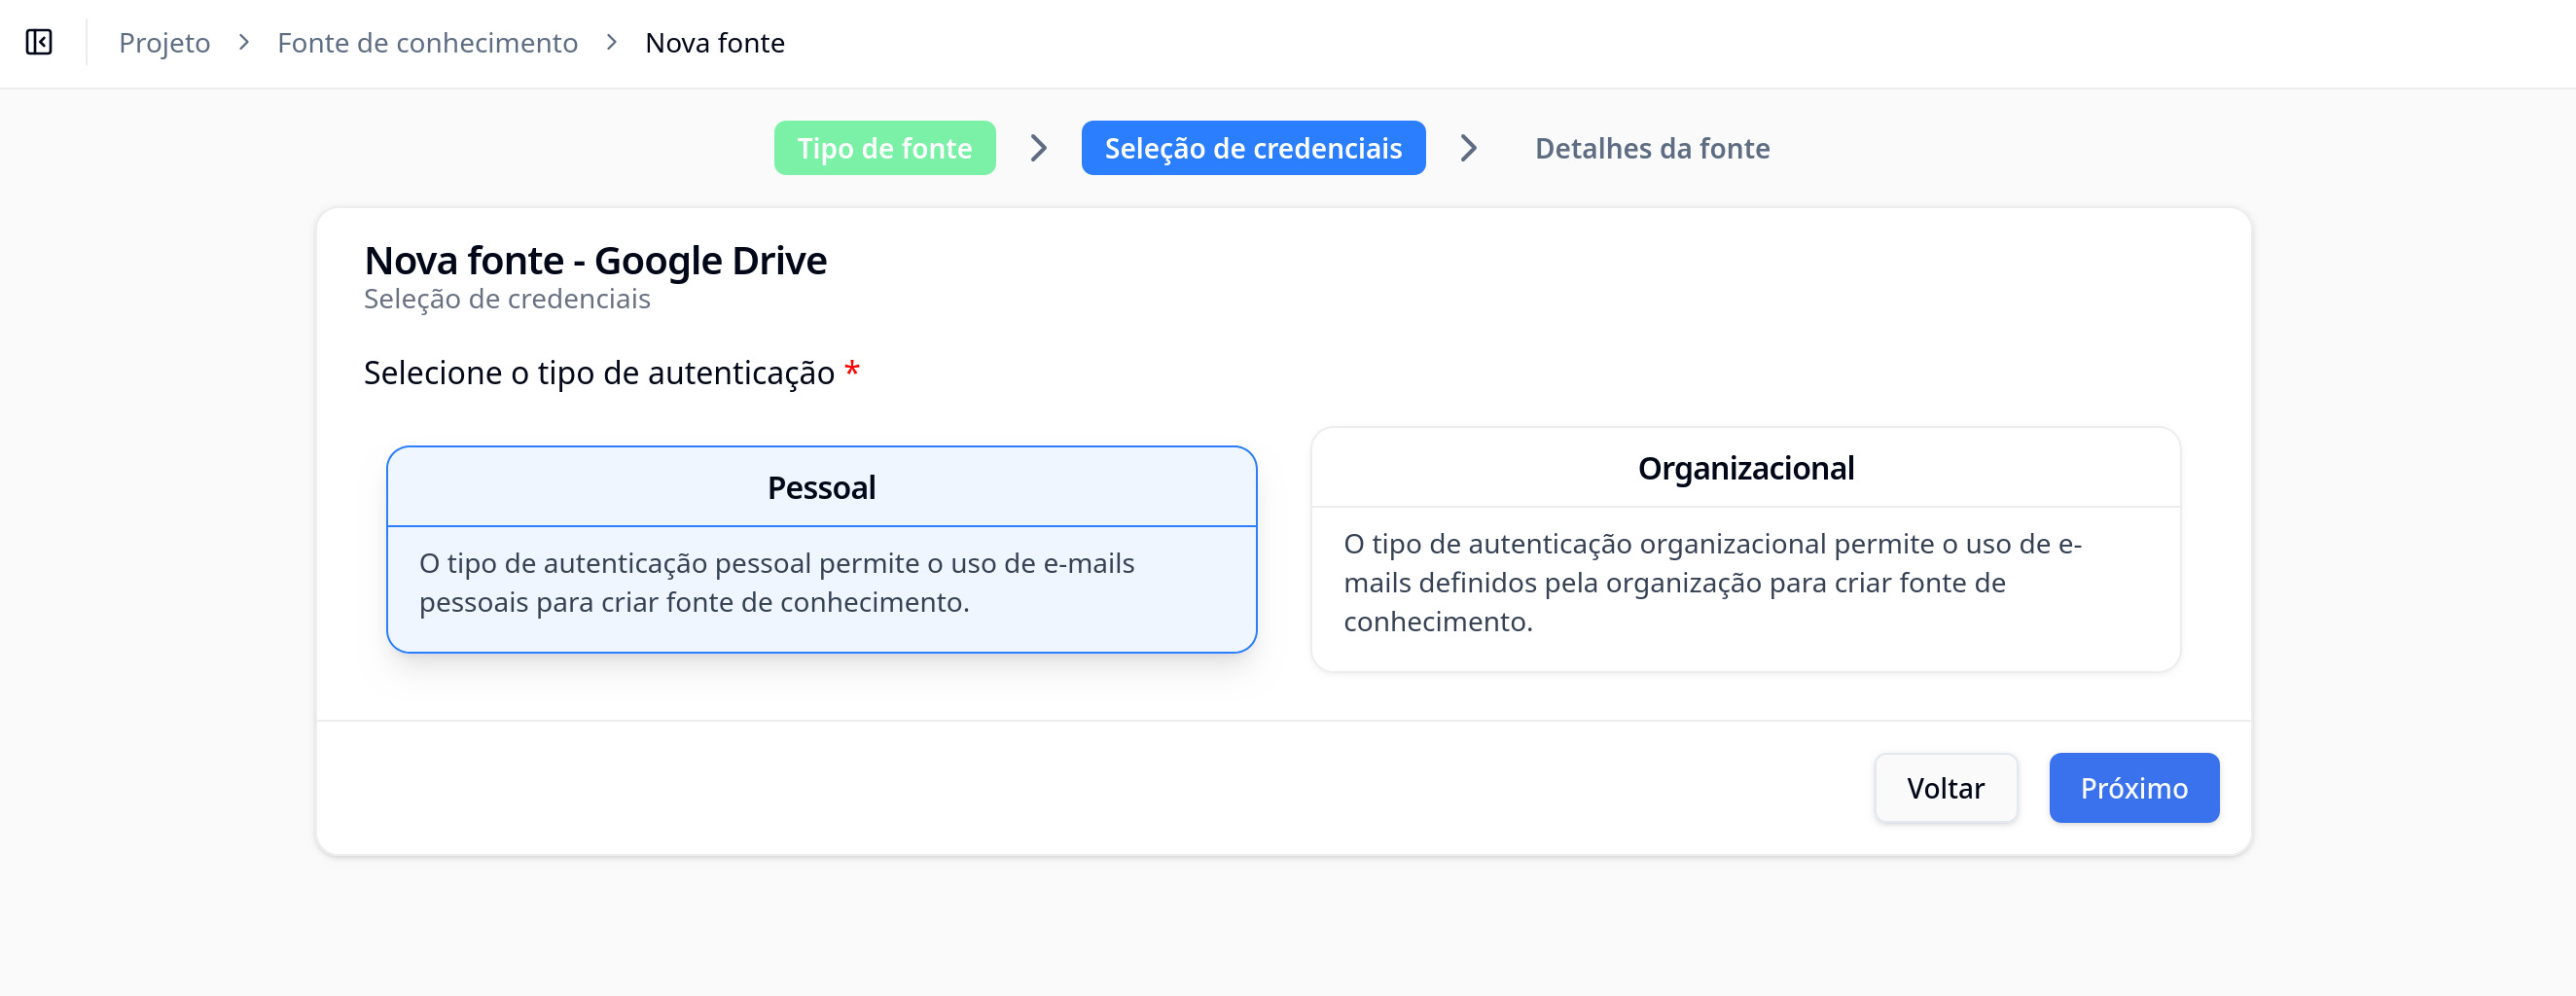
Intermediate Step: Selecting Credentials
For source types that require authentication (like Google Drive, Confluence, Jira), you will need to select or create a credential before you can proceed to detail configuration.
How to Select a Credential
- After selecting the source type (e.g., "Google Drive"), the interface will show a list of available credentials.
- If you already have configured credentials, select the appropriate one from the list.
- If there are no available credentials or if you need to create a new one, you can:
- Create a new credential directly from this screen (if available).
- Navigate to the Credentials section to create a new credential before proceeding.
- After selecting a valid credential, the Next button will be enabled.
- Click Next to continue.
Note: Make sure you have configured the necessary credentials in the Credentials section before creating sources that require authentication. For more information on how to create credentials, refer to the Credentials documentation.
Configuring Details
After selecting the source type (Google Drive, Web Scraper, Confluence, etc.), you will need to provide specific information about the knowledge source you are creating. The required fields vary depending on the chosen type.
Common Fields
Regardless of the source type, you will generally need to provide:
- Name: A descriptive name to identify the knowledge source.
- Description (optional): A more detailed description of the source's purpose.
Specific Settings by Type
Google Drive / Organizational Google Drive
- Root Folder ID: The ID of the Google Drive folder to be synced.
- Credentials: Select the Google credentials configured in the Credentials section.
- Target User Email (only for Organizational Google Drive): The email of the account whose documents will be accessed.
Web Scraper (Indexer)
- URL: The URL of the web page to be extracted (use the link of a website as the knowledge source).
- Extraction Type: Choose between "single" (only the specified page) or "all" (all related pages).
- Owner Email: The email of the user who will be marked as the owner of the extracted files.
Upload
- Files: Select the files you wish to upload.
- Owner Email: The email of the user who will be marked as the owner of the files.
Confluence
- Base URL: The base URL of your Confluence (e.g., https://your-domain.atlassian.net).
- Credentials: Select the Confluence credentials configured.
- Spaces: Configure which Confluence spaces will be imported.
Jira
- Base URL: The base URL of your Jira (e.g., https://your-domain.atlassian.net).
- Credentials: Select the Jira credentials configured.
- Projects: Configure which Jira projects will be imported.
Finalizing Creation
- Fill in all required fields.
- Review the information provided.
- Click Create or Save to finalize the creation of the source.
Next Steps
After creating the knowledge source:
- The source will be processed, and the documents will be indexed automatically.
- You can monitor the processing status on the main Knowledge Sources page.
- The indexed documents will be available for use in AI assistants and knowledge collections.
Important Notes
- Make sure you have configured the necessary credentials before creating sources that require authentication (Google Drive, Confluence, Jira).
- Document processing may take some time depending on the amount of content.
- Some source types may require specific permissions in external services.
Troubleshooting
If you encounter problems when creating a knowledge source:
- Check if the credentials are configured correctly.
- Confirm that you have the necessary permissions in the external services.
- Verify that the URL or folder ID is correct.
- Check the logs section for more details on processing errors.