How to Create a New Assistant
This guide describes the complete flow for creating an assistant in the Admin Platform, whether it involves knowledge-enhanced retrieval (RAG) or is solely conversational.
Overview
When creating an assistant, you define:
- Basic information (name, description, provider/model)
- Prompts and parameters for the system, user, and response
- Operating mode: with or without RAG
- Knowledge sources and collections (when RAG is enabled)
- Optional MCP tools and workflows
Prerequisites
- Have at least one configured provider/model
- Have credentials and knowledge sources ready if you wish to use RAG
- Access permissions to the project where the assistant will be created
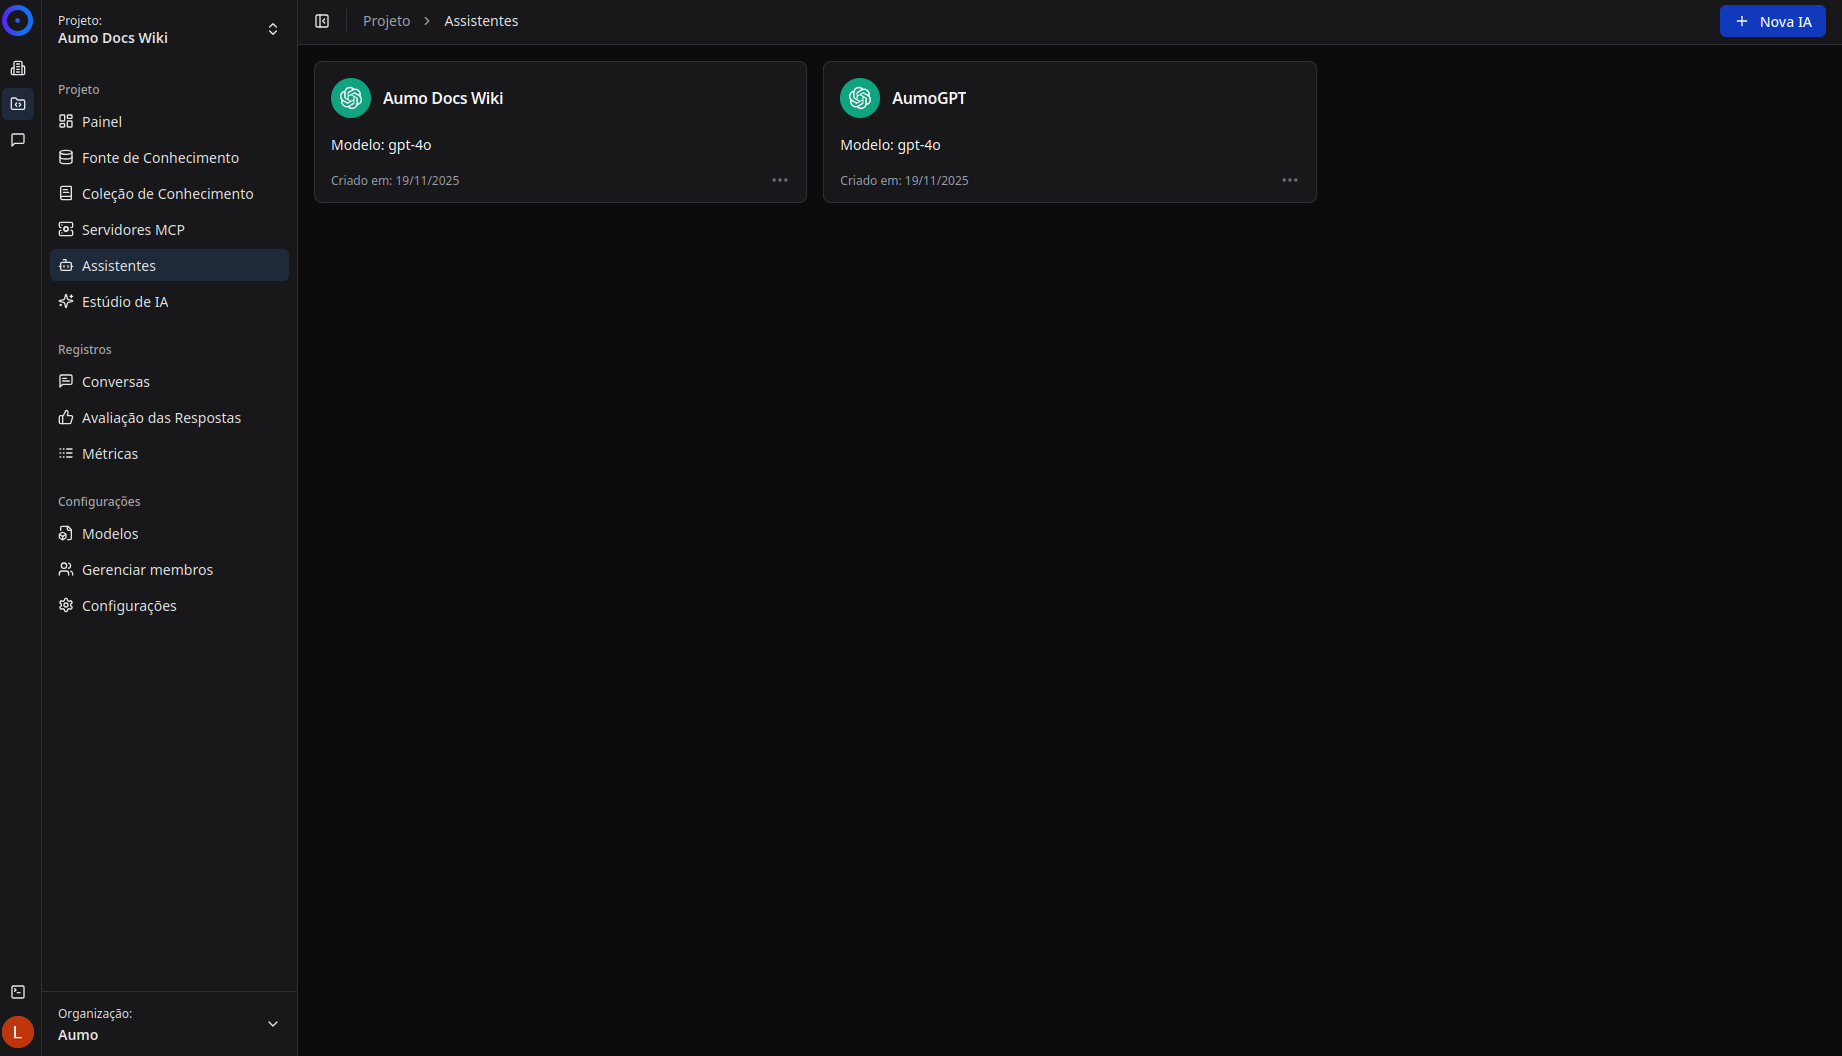
Step 1: Access the Creation Page
- Log in to the admin platform.
- In the main side menu, select Projects and choose the desired project.
- Click on Assistants in the project's side menu.
- Press the + New AI button in the top right corner.
Step 2: AI Selection
Upon clicking + New AI, you will be directed to the creation flow. The first step is to select the type of AI you wish to create.

- On the "New AI" screen, you will see the Assistant option available.
- Click on the "Assistant" card to create a customized AI assistant.
- Click Next to continue.
Step 3: Assistant Details
In the second step, you will configure the assistant's basic information:
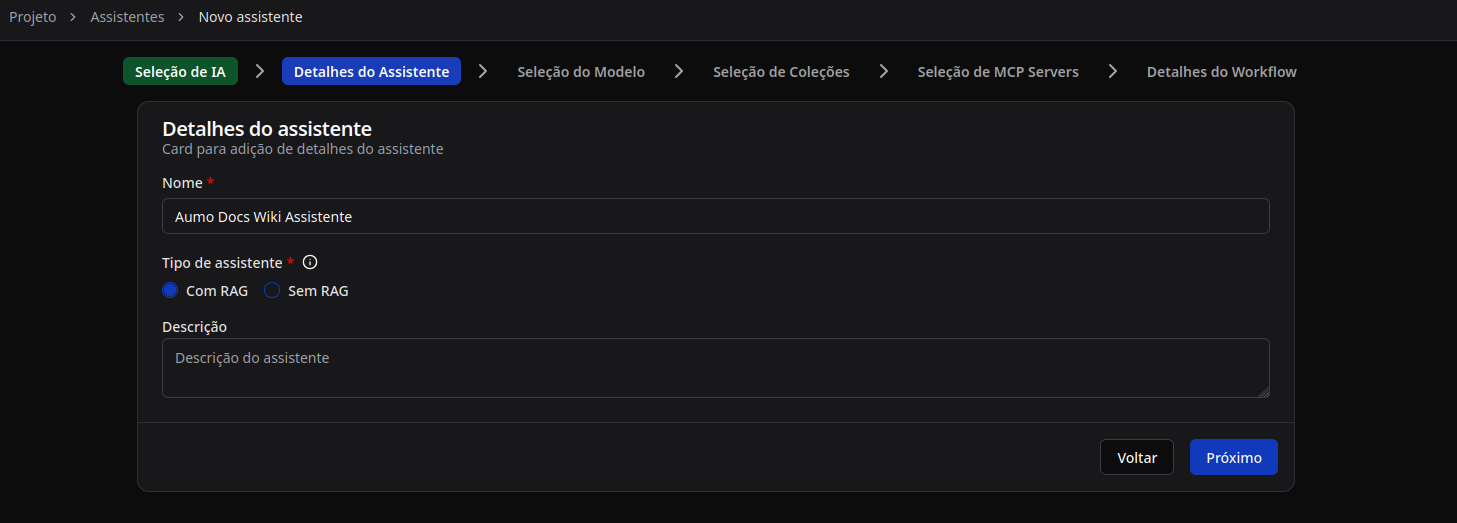
Fill in the following fields:
- Name (mandatory): A descriptive name to identify the assistant.
- Assistant Type (mandatory): Choose between:
- With RAG: For assistants that use knowledge-enhanced retrieval.
- Without RAG: For conversational assistants without access to knowledge sources.
- Description: An optional description about the assistant's purpose and functionalities.
After filling in the details, click Next to continue.
Step 4: Model Selection
In the third step, you will select the AI model that will be used by the assistant.
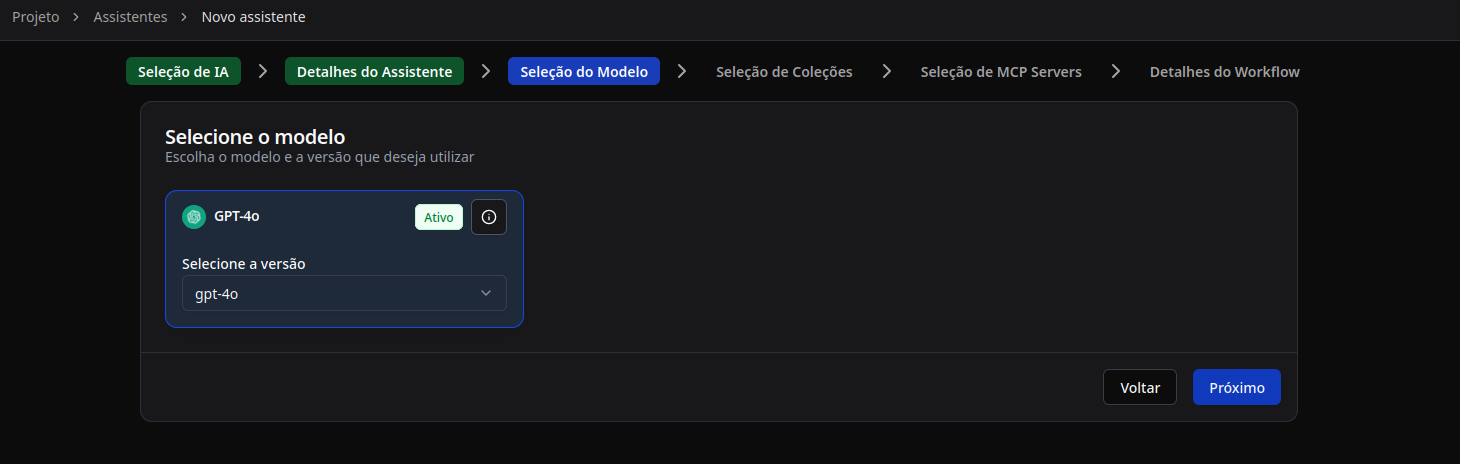
- Review the available models in the list.
- Click on the desired model (for example, "GPT-4o").
- Select the specific version of the model from the "Select version" dropdown.
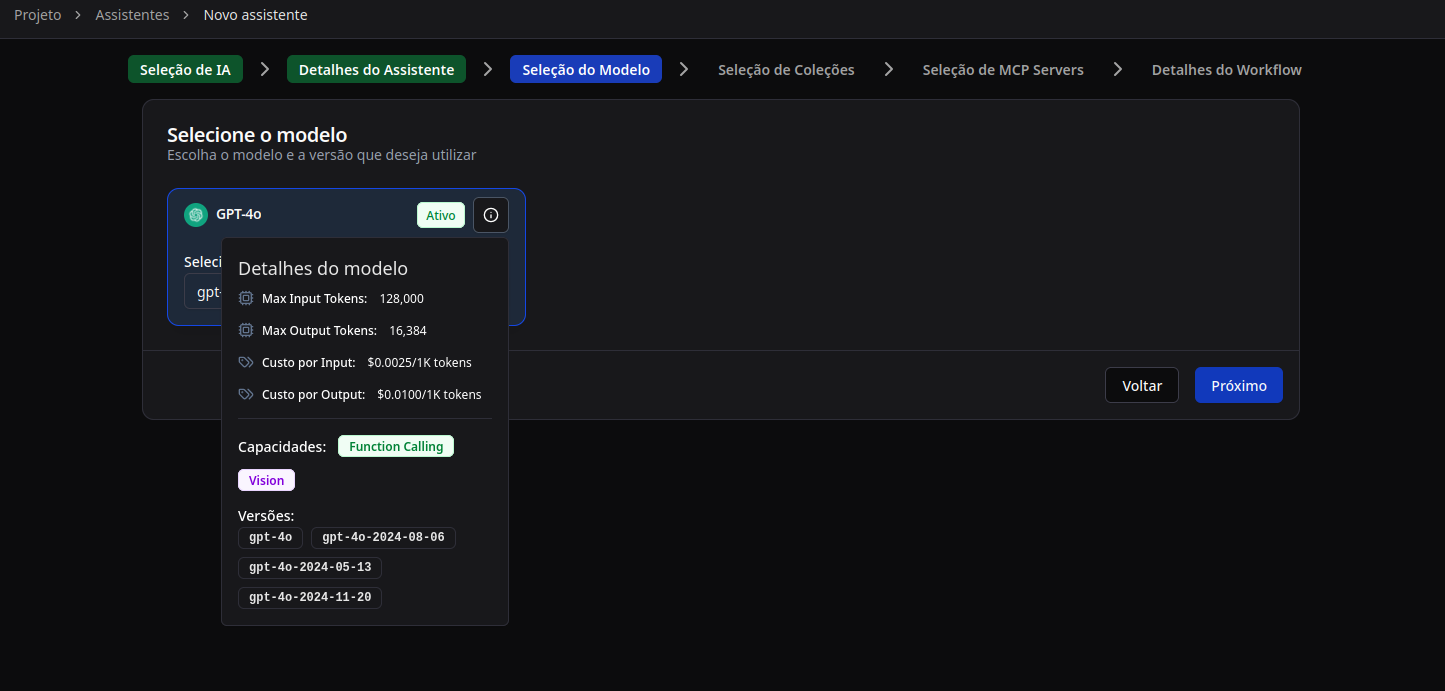
- You can click on the information icon (ⓘ) to view model details, including:
- Token limits (input and output)
- Costs per token
- Capabilities (Function Calling, Vision, etc.)
- Available versions
After selecting the model and version, click Next to continue.
Step 5: Choose Operating Mode (Without RAG vs. With RAG)
Assistant Without RAG
- Ideal for flows where all context is in the prompt or in MCP tools.
- Just confirm the prompts and parameters; no knowledge sources are loaded.
Assistant with RAG
- If you selected "With RAG" in the previous step, this stage will allow you to select knowledge collections.

- Select Knowledge Collections: Click on the cards of the collections you wish to use. The selected collections will appear highlighted in blue.
- You may select multiple collections to combine different knowledge sources.
- Configure filters, the number of retrieved documents, relevance order, and citation policies (these options will be available in the workflow stage).
- Adjust specific fields such as context size, search temperature, and token limits.
To create collections or sources, refer to the Introduction to Knowledge Collections and the Introduction to Knowledge Source.
Step 6: MCP Server Selection
You may enable MCP integrations to allow the assistant to execute external actions (query APIs, trigger automations, etc.).
To select MCP servers, you first need to install them in the MCP Servers section of the project. Access this section through the project's side menu.
In the MCP Servers screen, you can:
- View Installed servers.
- Search and install servers from Docker Hub.
- Search and install servers from GitHub.
To install a server from Docker Hub:
- Click on the Docker Hub tab.
- Use the search bar to find the desired server.
- Click on the server card to view the details.
- Review the server information, including:
- Server description
- Author and Docker image
- Required command
- Required environment variables
- Configure any necessary environment variables (e.g.,
BRAVE_API_KEYfor the Brave Search server). - Click Install.
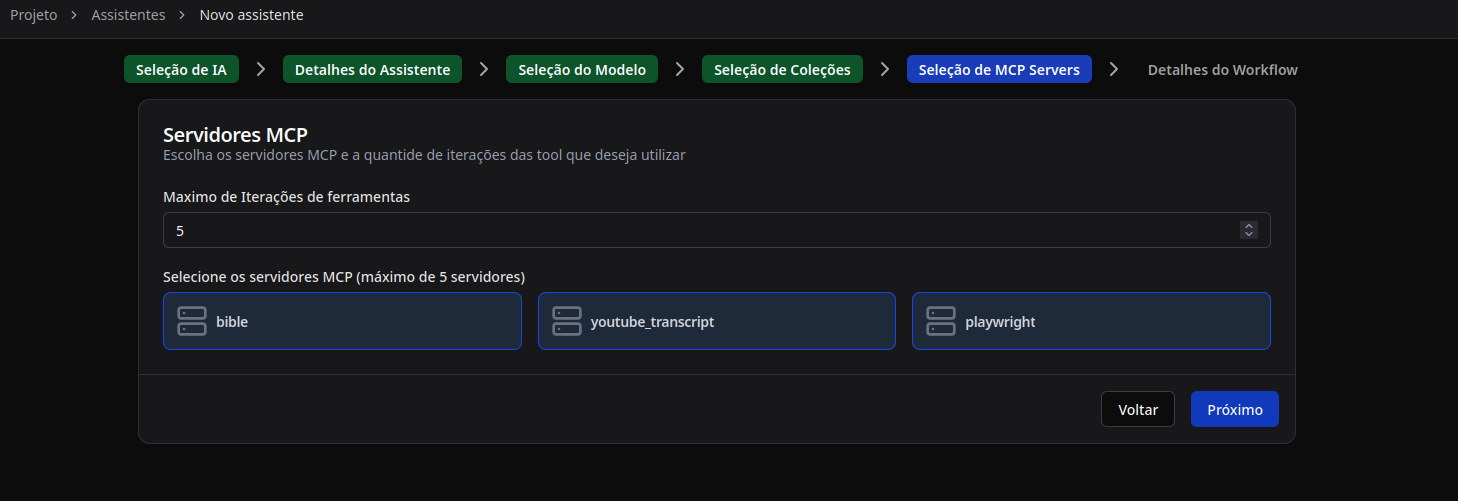
After installing the MCP servers, you will be able to select them in the assistant creation step:

- Configure the Maximum Tool Iterations: Define how many times tools can be executed sequentially (e.g., 5).
- Select MCP servers: Click on the MCP servers you wish to enable (maximum of 5 servers).
- The selected servers will appear highlighted in blue.
- Examples of available servers: "bible", "youtube_transcript", "playwright", etc.
After configuring, click Next to continue.
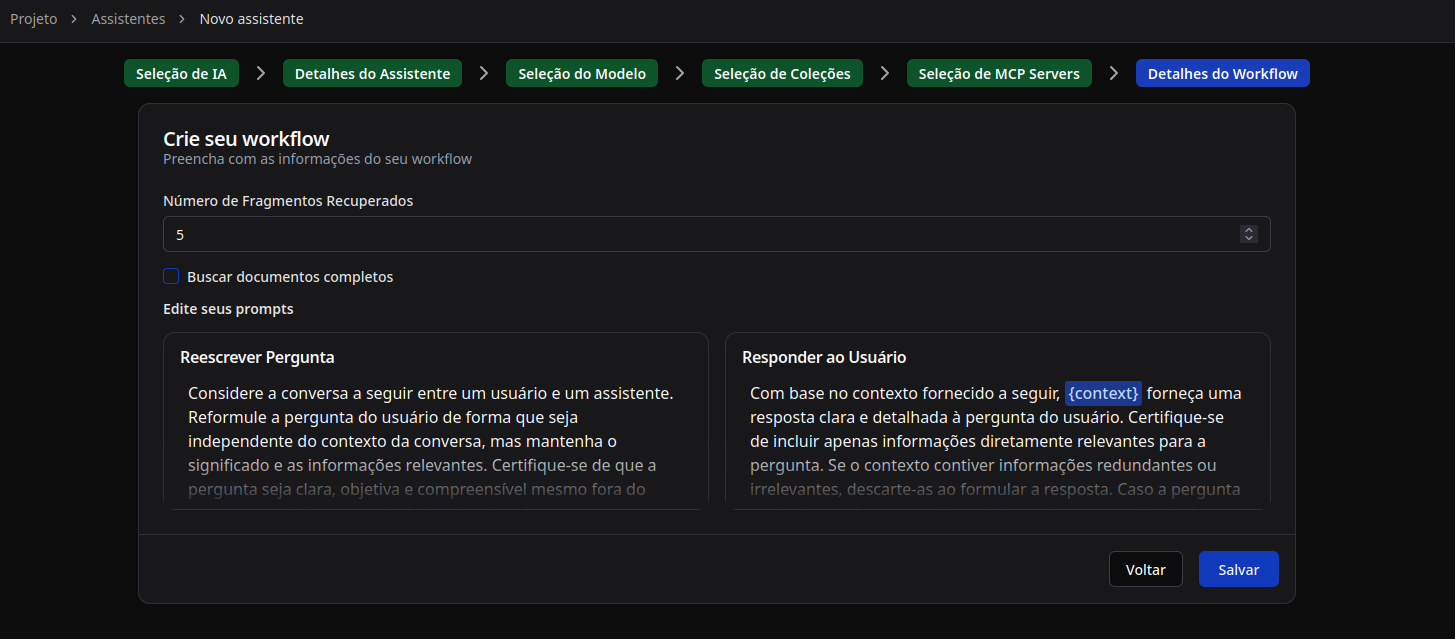
Step 7: Workflow Details
In the final step, you will configure the workflow details and the assistant's prompts.
Configure the following options:
- Number of Retrieved Fragments: Define how many document fragments will be retrieved for context (e.g., 5).
- Fetch Complete Documents: Check this option if you wish to retrieve complete documents instead of just fragments.
- Edit your prompts:
- Rephrase Question: Prompt that reformulates the user's question independently of the conversation context.
- Respond to User: Prompt that guides how the assistant should respond based on the provided context.
After reviewing all settings, click Save to create the assistant.
Step 8: Confirmation
After clicking Save, you will see a success notification confirming that the assistant has been created.
The assistant will be immediately available in the assistant listing and can be used in conversations right away.